Reviewing Document Results
Understanding the AI checks, extracted data, and how to act on a document analysis
When you click on any document in the Analysis → By document list, you open its full detail view. This is where you see exactly what the AI found, which checks passed or failed, and the data it extracted from the document.
The detail view
The detail view is split into two panels:
- Left panel — AI verdict, detailed check results, and extracted fields
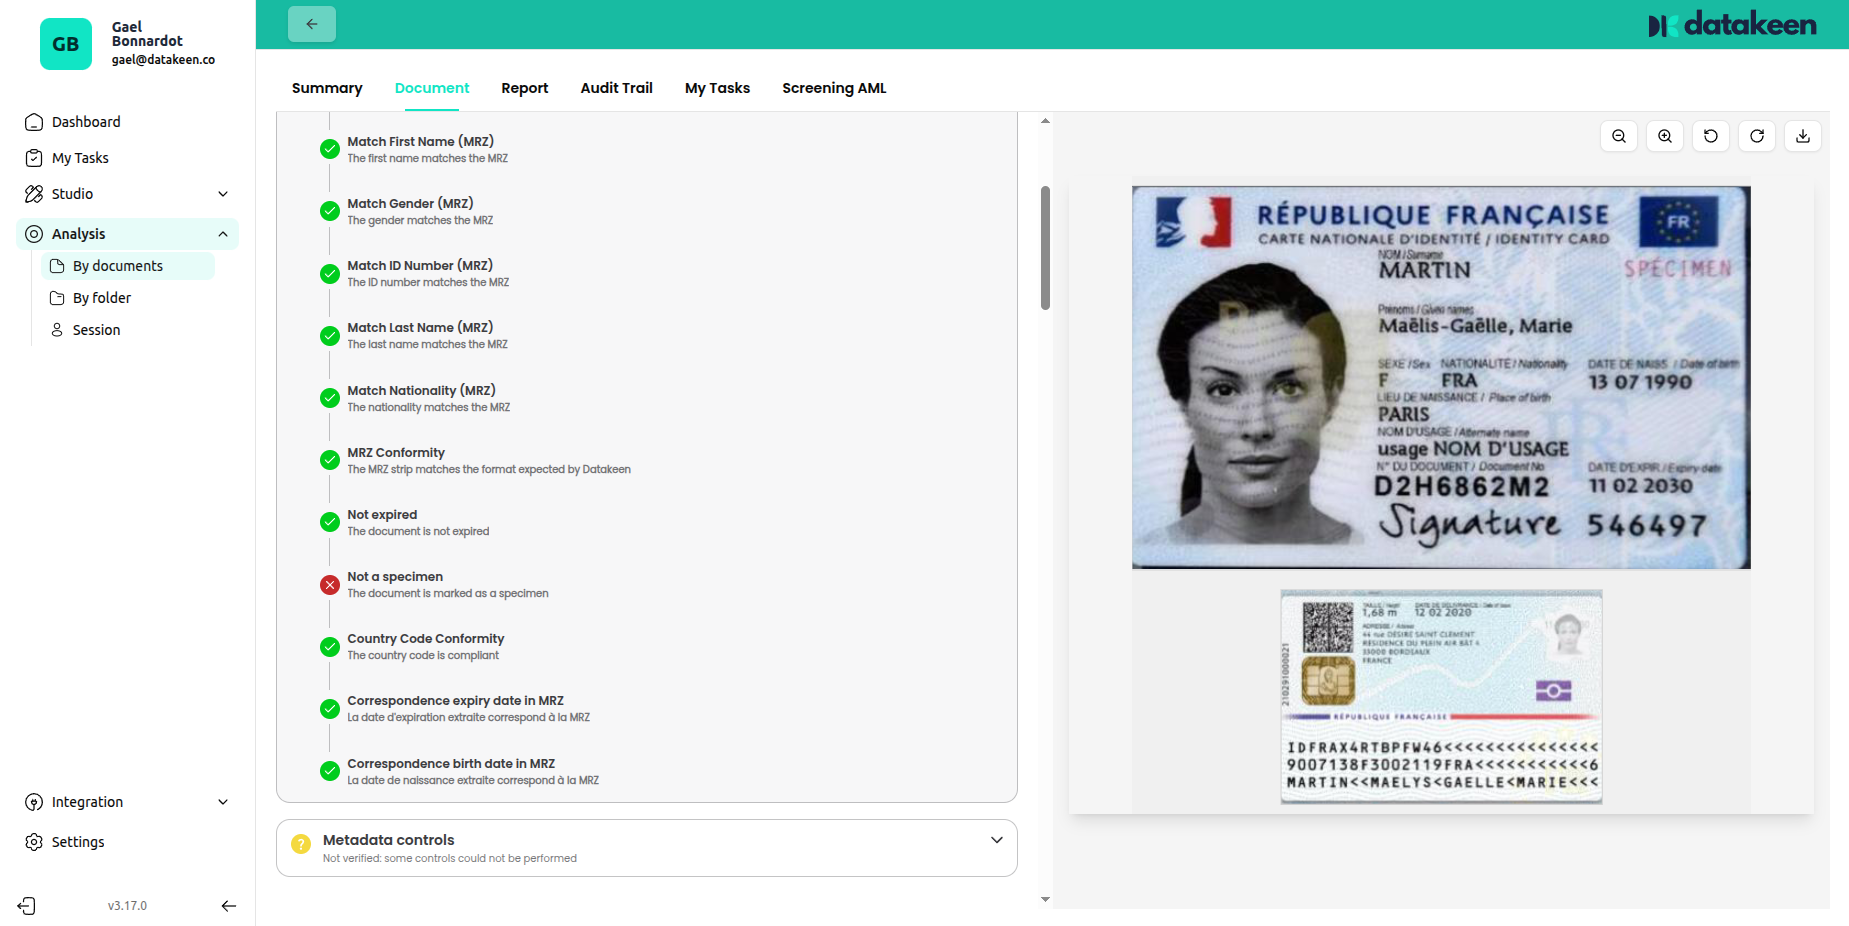
- Right panel — The actual document image as submitted by the user
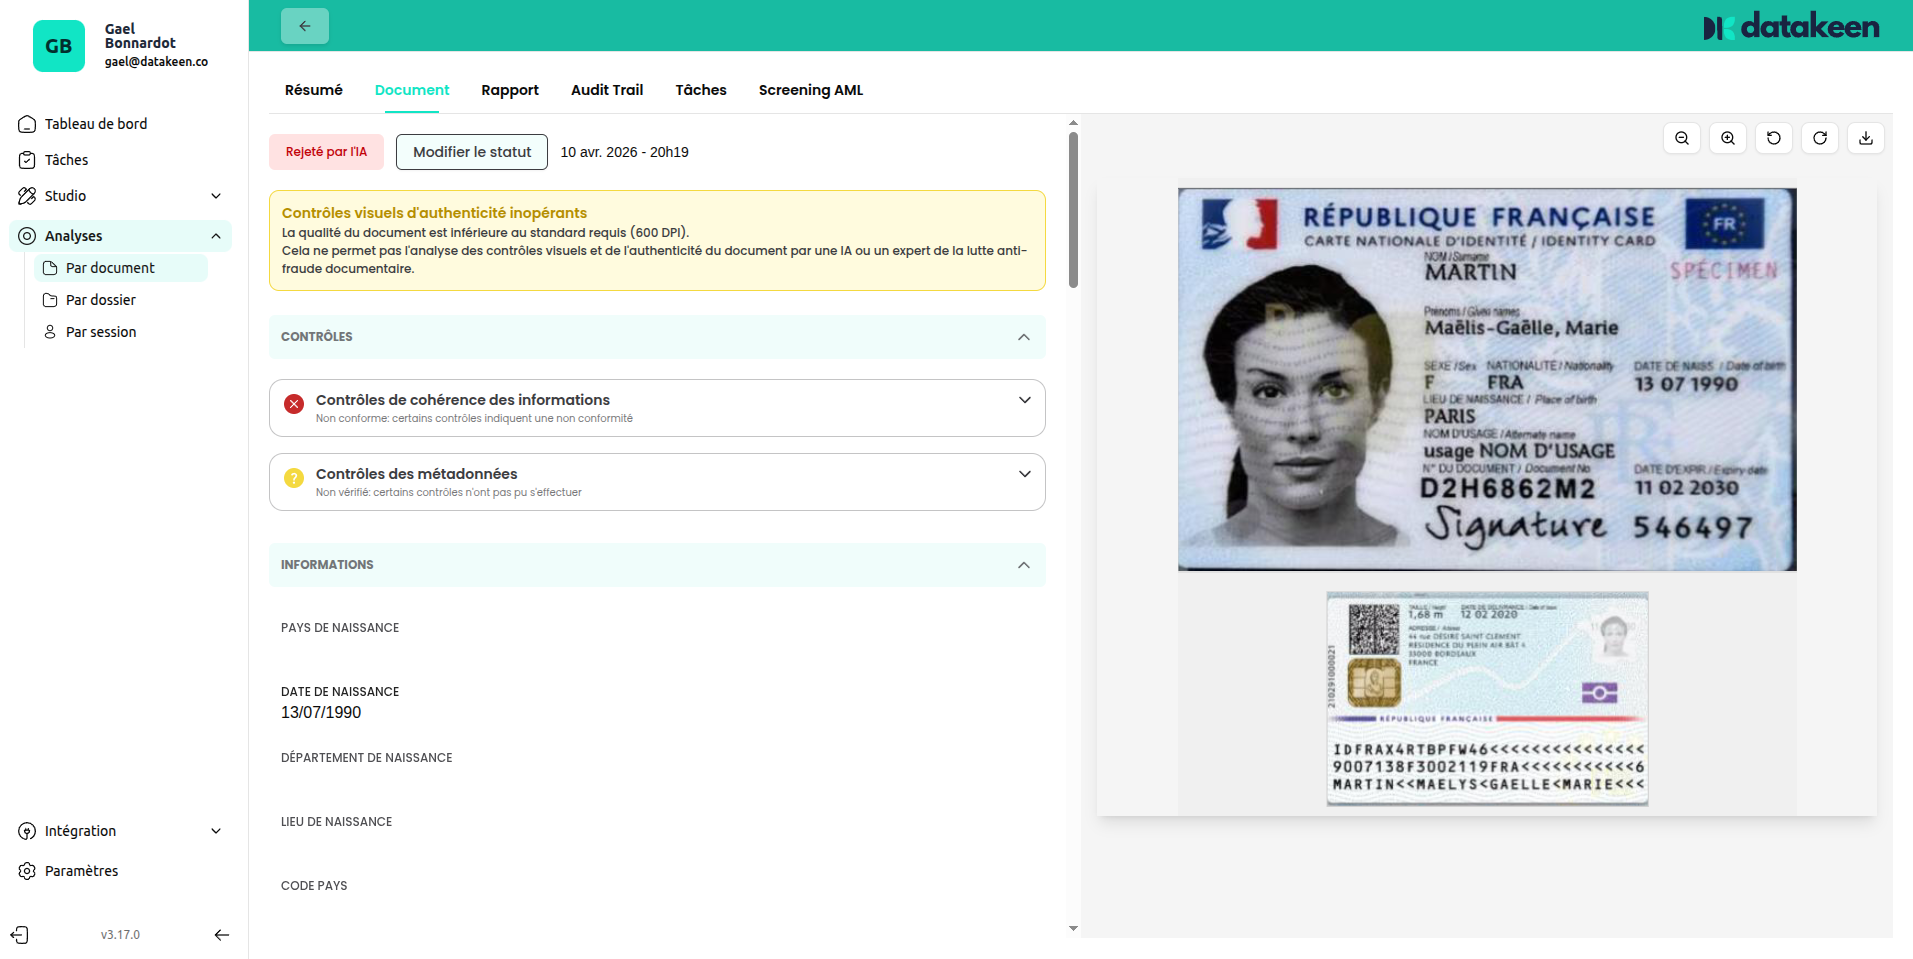
At the top you'll see the overall status (Approved by AI / Rejected by AI / To review) and a "Change status" button to override the AI decision.
The tabs at the top mirror those in the session detail: Summary, Report, Audit Trail, Tasks, AML Screening.
AI checks
The AI runs several categories of checks on every document. Each check is shown with a pass/fail/warning indicator.
Visual authenticity check
The visual authenticity check analyses the document image for signs of tampering or forgery.
- A green check 🟢 → the document passes visual inspection
- A red check 🔴→ the check fails and the document is flagged
- A yellow check 🟡 → a data point is missing to perform the check
Data consistency check
Checks that the data on the document is internally consistent — for example:
| Check | What it verifies |
|---|---|
| Not expired | The document's expiry date is in the future |
| Not a specimen | The document is not a sample/test document |
| Country code conformity | The issuing country code matches the document type |
| Expiry date match (MRZ) | The expiry date visible on the document matches the MRZ line |
| Date of birth match (MRZ) | The date of birth visible on the document matches the MRZ line |
For the full list of all available controls per document type, see the Document Extraction API v2 reference.
Metadata check
Checks the technical metadata of the submitted file — for example, detecting if the image was digitally altered after capture, or if it was printed and re-photographed.
Extracted information
Below the checks, the Information section shows all the data the AI extracted from the document:
| Field | Description |
|---|---|
| Country of birth | Country of birth |
| Date of birth | Date of birth |
| Department of birth | Department/region of birth (French documents) |
| Place of birth | City of birth |
| Country code | Country code |
Additional fields are extracted depending on the document type — passport number, MRZ data, SIRET (for company documents), bank details (for RIBs), etc.
For the full list of all extracted fields per document type, see the Document Extraction API v2 reference.
Acting on the result
Approving or rejecting manually
If you disagree with the AI verdict — for example, the AI rejected a document due to a minor image quality issue that you can verify is genuine — click "Change status" and select your decision, adding a reason.
Your decision is recorded in the Audit Trail and can trigger the back-office decision webhook if configured.
Requesting a new submission
If the document is too low quality to make a decision, you can contact the user and ask them to resubmit through a new session or send you a new document to be analyzed through Analysis → By Document.
Tips
- A yellow warning on a check means it was inconclusive — not necessarily a failure, but worth a second look.
- Always review the document image (right panel) alongside the check results. Sometimes the AI flags an issue that is visually obvious (e.g. a watermark, a cut corner, or handwriting on the document).
- The DKS score is visible as a numeric value. Scores in the 50–60 range are borderline — use your judgement and the visual image to decide.
Updated 1 day ago