PDF Generation
Automatically generate a personalised PDF document from data collected in the journey
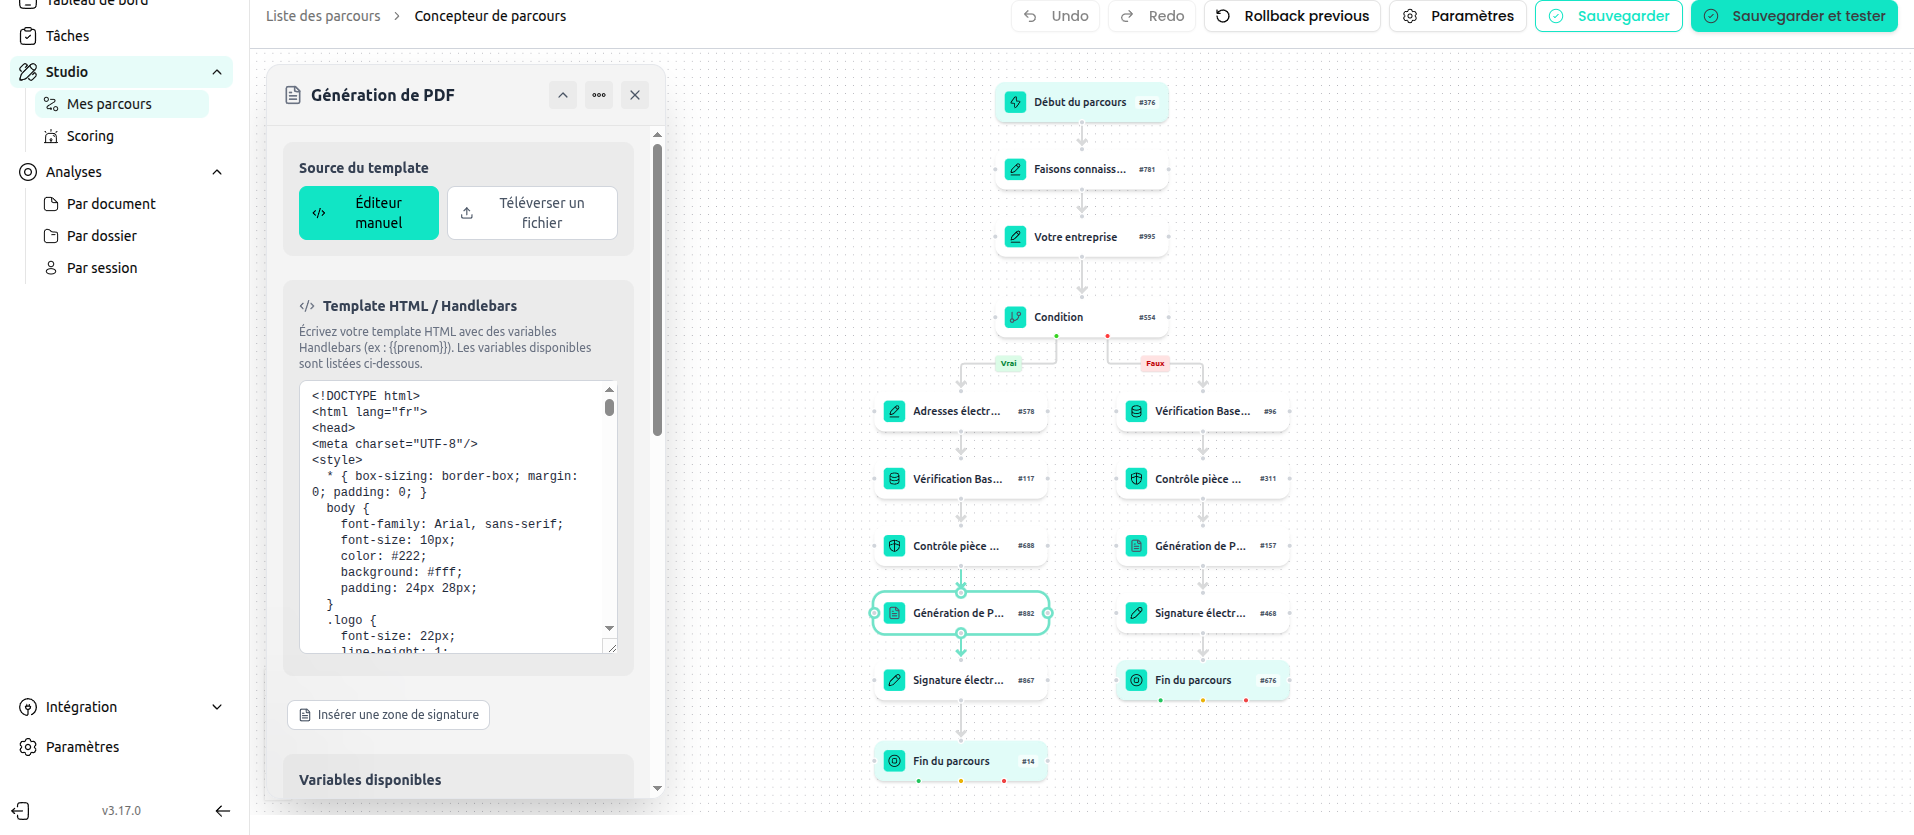
The PDF Generation node automatically creates a personalised PDF document using data collected earlier in the journey. You define a template — either by writing HTML directly or uploading a file — and Datakeen fills it in with the actual values entered by the user.
The generated PDF is stored in the session record and can be downloaded by your analysts, used as the document to sign in an Electronic Signature node, or attached to the session report.
Template source
Choose how you want to define the document template:
| Option | Description |
|---|---|
| Manual editor (HTML editor) | Write the document directly in HTML/Handlebars in the built-in editor |
| Upload a file | Upload a pre-designed HTML file |
Manual editor
Write your document directly in HTML using Handlebars syntax for dynamic values. Use {{ }} placeholders where you want data to appear, and standard HTML/CSS for layout and styling.
Upload a file
If you have a pre-designed HTML file, switch to "Upload a file" and select your .html file from your computer. The file's contents are loaded into the node and processed the same way as a manually written template.
Available variables
Click on the "Available variables" section to browse all the data you can insert into your template.
Variables are derived from the data collected in earlier steps.
Standard identity variables
| Variable | Source |
|---|---|
{{prenom}} | First name (Identity Information) |
{{nom}} | Last name (Identity Information) |
{{denomination_sociale}} | Company name (custom form field) |
{{siren_entite}} | SIREN number (custom form field) |
{{adresse_postale}} | Postal address (custom form field or structured address) |
{{date_effective}} | Effective date of mandate (custom form field) |
{{fonction}} | Signatory's job title (custom form field) |
{{date_signature}} | Signature date (custom form field) |
{{email_facturation}} | Billing email address (custom form field) |
Custom form field variables
Every field you add in an Information Input node upstream is also available as a variable. The variable name is derived from the field's label: it is lowercased, accents are removed, and any character that is not a letter or digit (spaces, punctuation, °, /, etc.) is replaced by an underscore. Leading and trailing underscores are then stripped.
For example:
| Field label | Handlebars variable |
|---|---|
Date of birth | {{date_of_birth}} |
N° de SIREN | {{n_de_siren}} |
Dénomination Sociale | {{denomination_sociale}} |
The variables panel in the node configuration lists all available custom fields and lets you copy them directly into your template.
List variables (dynamic tables)
If an upstream Information Input node contains a list field, its rows are available for iteration in the template:
{{#each mandats}}
  <tr>
    <td>{{this.denomination_sociale}}</td>
    <td>{{this.siren}}</td>
    <td>{{this.adresse_facturation}}</td>
  </tr>
{{/each}}
The variables panel marks list fields with (list → #each) to indicate they should be used with {{#each}}.
Simply copy the variable name from the panel and paste it into your template where you want the value to appear.
Signature zone
To allow the generated PDF to be signed in a subsequent Electronic Signature node, you must include a signature zone in your template. Insert the following HTML snippet where you want the signature to appear:
<div class="signature-box" data-dk-sign="First Party">Signature</div>The data-dk-sign attribute identifies the signing party. You can use the "Insert signature zone" button in the editor toolbar to add this snippet at the cursor position.
If an Electronic Signature node is connected after the PDF Generation node and your template does not contain a data-dk-sign attribute, the configuration panel will display a warning.
Cross-session consolidation
The "Cross-session consolidation" section lets you pull data from sessions completed in another journey — useful for multi-step workflows where information was collected across separate journeys.
This feature is only available in Manual editor mode (html-template).
How to configure it
- In the node configuration panel, open the "Cross-session consolidation" section.
- Select the source journey from the dropdown. This is the journey whose completed sessions contain the data you want to include.
- Optionally set a correlationId prefix and/or correlationId suffix to filter which sessions are included. Only sessions whose correlationId matches both filters are pulled in.
| Filter | Description | Example |
|---|---|---|
| CorrelationId prefix | Include only sessions whose correlationId starts with this value | 123- |
| CorrelationId suffix | Include only sessions whose correlationId ends with this value | -adb-immo |
Both filters can be combined (AND logic). If neither is set, sessions are matched by exact correlationId.
Using the data in your template
Once a source journey is selected, the variables panel shows a preview of the available fields under {{#each crossSessions}}. Use them like any other list:
{{#each crossSessions}}
  <tr>
    <td>{{this.denomination_sociale}}</td>
    <td>{{this.siren_entite}}</td>
    <td>{{this.email_facturation}}</td>
  </tr>
{{/each}}
Sessions with a status of ended, completed, ai_approved, user_approved, or conform are included. If no matching sessions exist at generation time, the crossSessions array is empty and the {{#each}} block produces no output — the PDF is still generated without error.
Page title and description
In the "Page settings" section you can customise what is displayed to the user while the PDF is being generated:
| Field | Default value |
|---|---|
| Page title | "Document generation" |
| Page description | "Your document is being prepared, please wait…" |
These values are shown on the loading screen in the session interface. They have no effect on the PDF content itself.
Using the generated PDF for signing
The most common use of the PDF Generation node is as a lead-in to the Electronic Signature node. After the PDF is generated with the user's data filled in, they can immediately sign it in the next step.
To link them:
- Add a PDF Generation node
- Add an Electronic Signature node after it
- In the Electronic Signature settings, set "Document to sign" to "PDF Generation"
- Make sure your template includes a signature zone (
data-dk-signattribute) — see Signature zone above.
Tips
- You can test your template by previewing the journey with sample data.
- Keep your HTML/CSS simple — complex layouts may not render identically on all platforms.
- The generated PDF is A4 format by default.
- Avoid external fonts (e.g. Google Fonts) — the rendering engine has no network access, so external resources will not load.
- If your template references a variable that has no value (the user skipped a step), that field will be empty in the PDF. Make the corresponding form fields required if this is a problem.
- If you use
{{#each mandats}}but the upstream list field has no rows, the table section will be empty — this is expected behaviour and does not cause an error.
Updated about 6 hours ago