Creating a Journey
A step-by-step guide to building your first journey in the Journey Builder
Creating a journey takes just a few minutes. This guide walks you through the whole process — from naming your journey to publishing it for your users.
1. Go to the Journey Builder
From the left sidebar, click Studio → My journeys. You'll see a list of all the journeys you've already created.
Click + New journey in the top-right corner to get started.

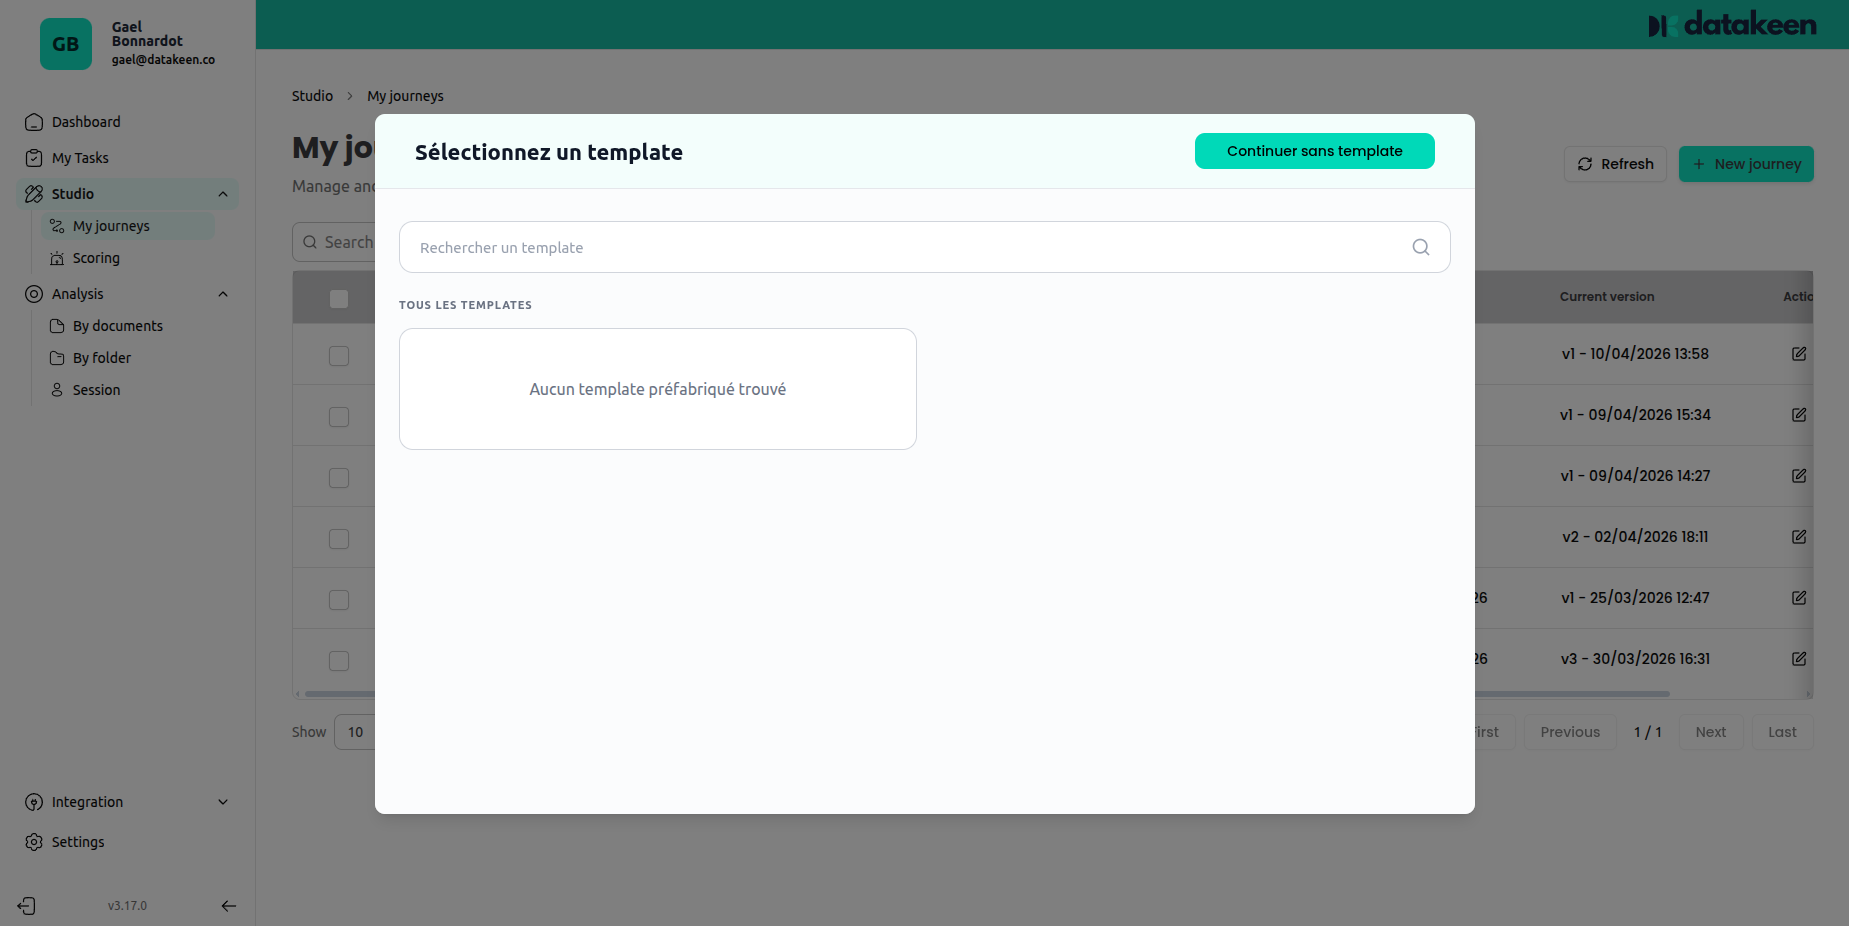
2. Choose a template (optional)
A template picker will appear. Templates are pre-built journey structures that you can use as a starting point and customise.
If you'd prefer to start from scratch, simply close the modal or choose "no template".
3. The Journey Designer
Once you enter the designer, you'll see an empty canvas with a "Start of journey" node already placed for you. This is the welcome screen your users will see first.
On the left panel, you can browse and add new steps to your journey.
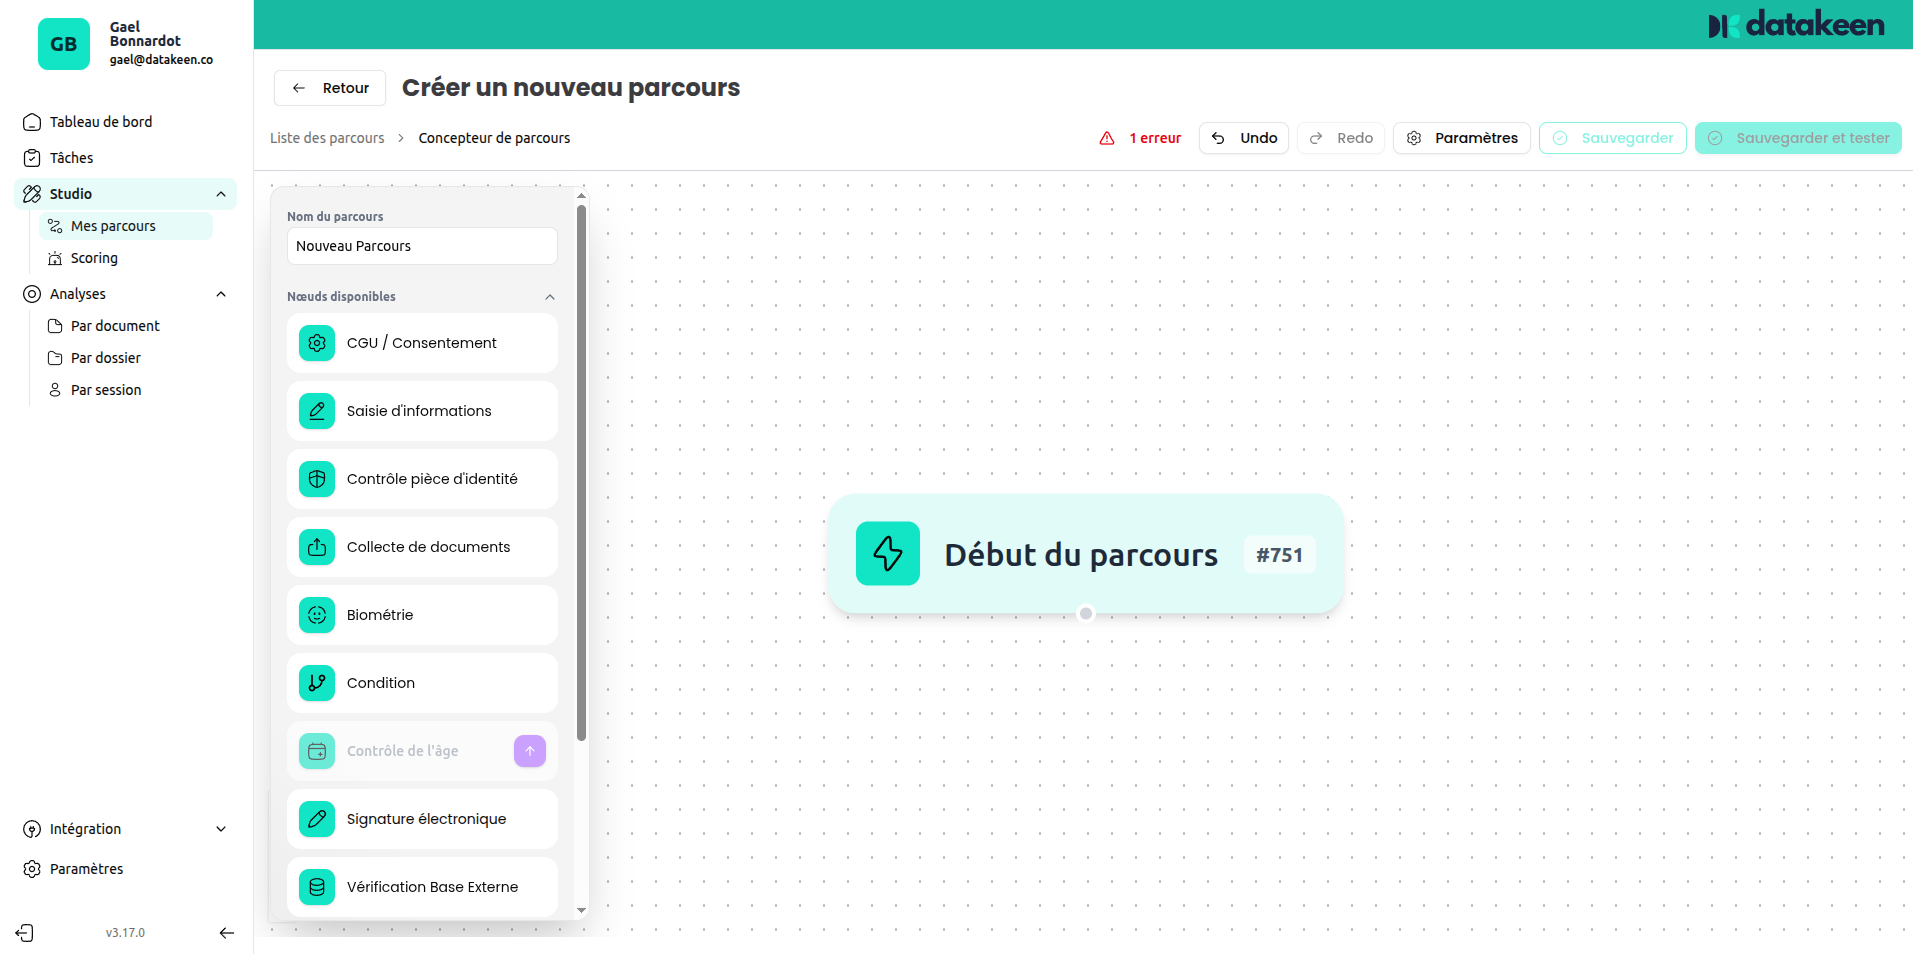
To add a step: click a step type from the left panel — it will appear on the canvas and automatically connect to the previous step.
To configure a step: click on it in the canvas to open its settings panel on the left.
4. Configure the journey settings
Before going further, it's a good idea to fill in the journey parameters. Click Settings in the top toolbar to open the settings panel.
General settings
Give your journey a clear name and, optionally, a description. The version number is managed automatically — every time you publish a change, the version increments.
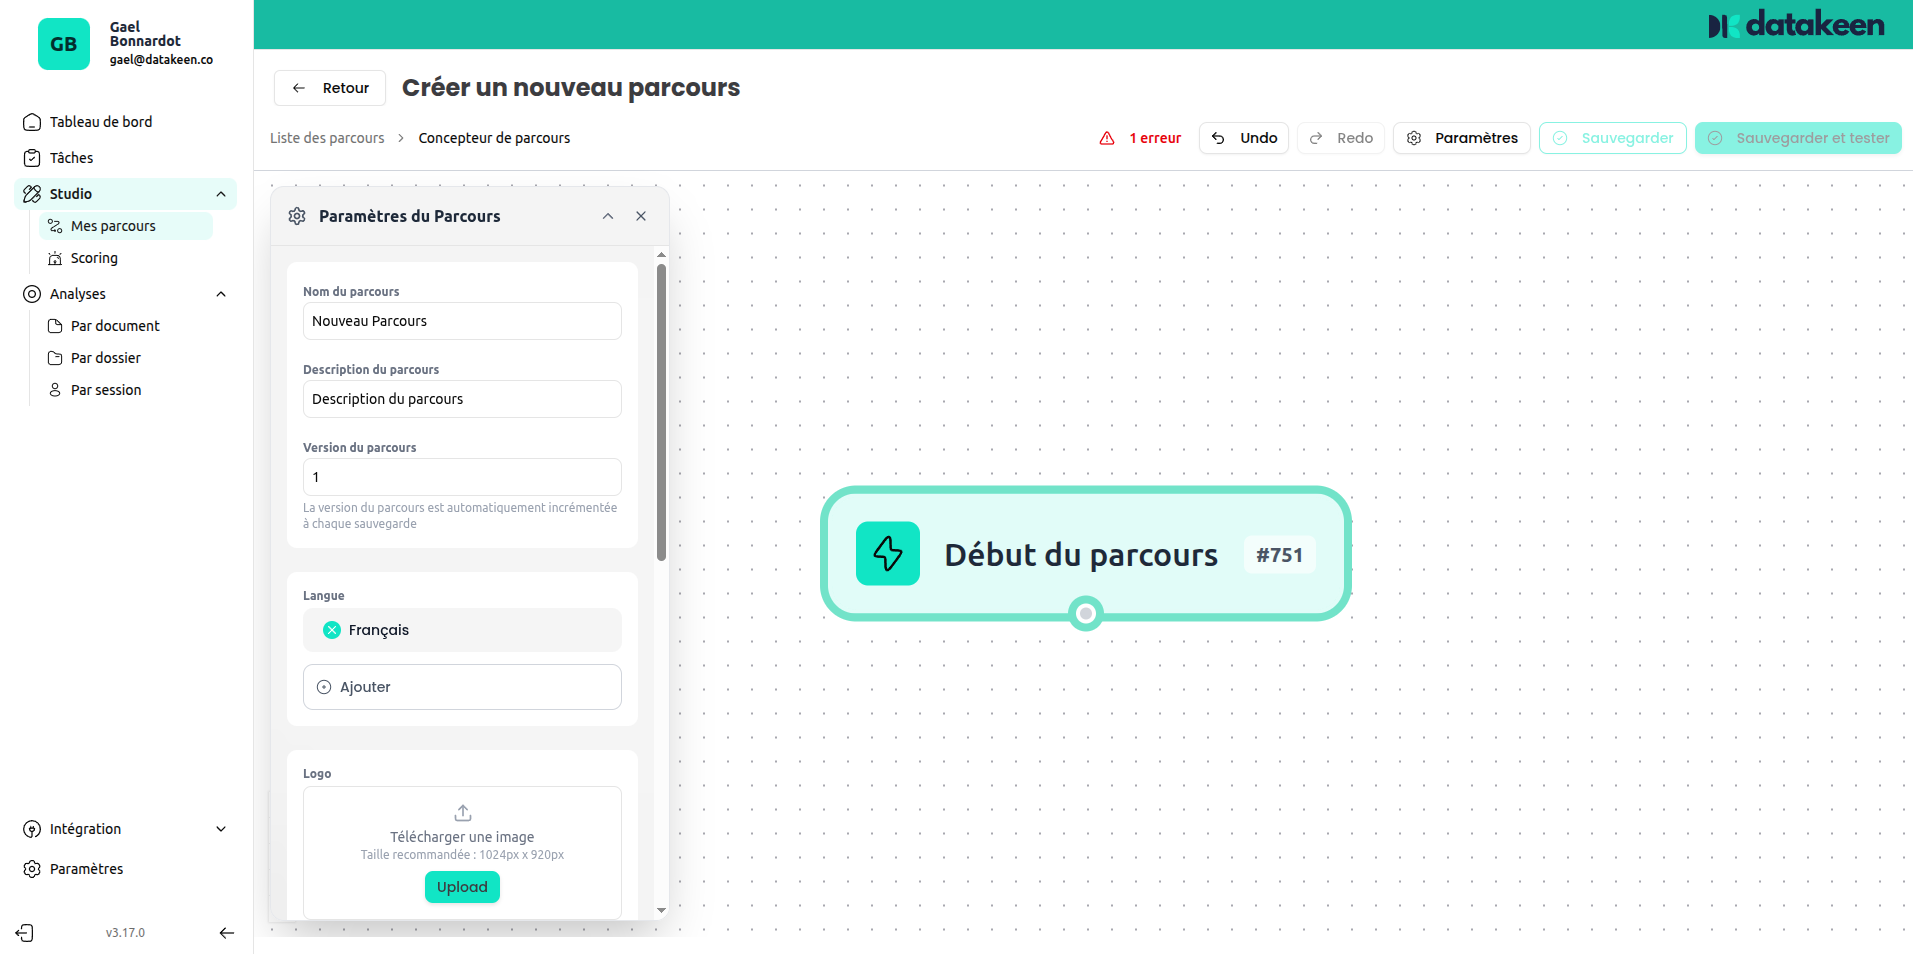
Branding
Upload your logo and customise the button colours to match your brand. Your users will see these on every screen of the journey.
Platforms
Choose where this journey will be available: Mobile, Desktop, or Back Office. You can enable multiple platforms at once.
Back Office mode allows your team to run the journey manually on behalf of a customer — useful for in-person or phone-based onboarding.

5. Build your step sequence
Add steps one by one from the left panel. Each step you add connects automatically to form a linear flow. You can also add a Condition step to create branching paths (see Condition).
Here are some typical journey patterns:
Simple identity check: Start → Identity Information → Identity Document Check → Biometrics → End
Full KYC onboarding: Start → Identity Information → Identity Document Check → Biometrics → Document Collection → External Database Check → End
Document signing flow: Start → Identity Information → Custom Form → PDF Generation → Electronic Signature → End
6. Save and publish
When you're happy with your journey, click Save and test to save. The journey is versioned automatically — you can always roll back to a previous version if needed.
Any error indicators (shown in red at the top of the designer) must be resolved before the journey can be saved. These usually indicate a step with missing required configuration.
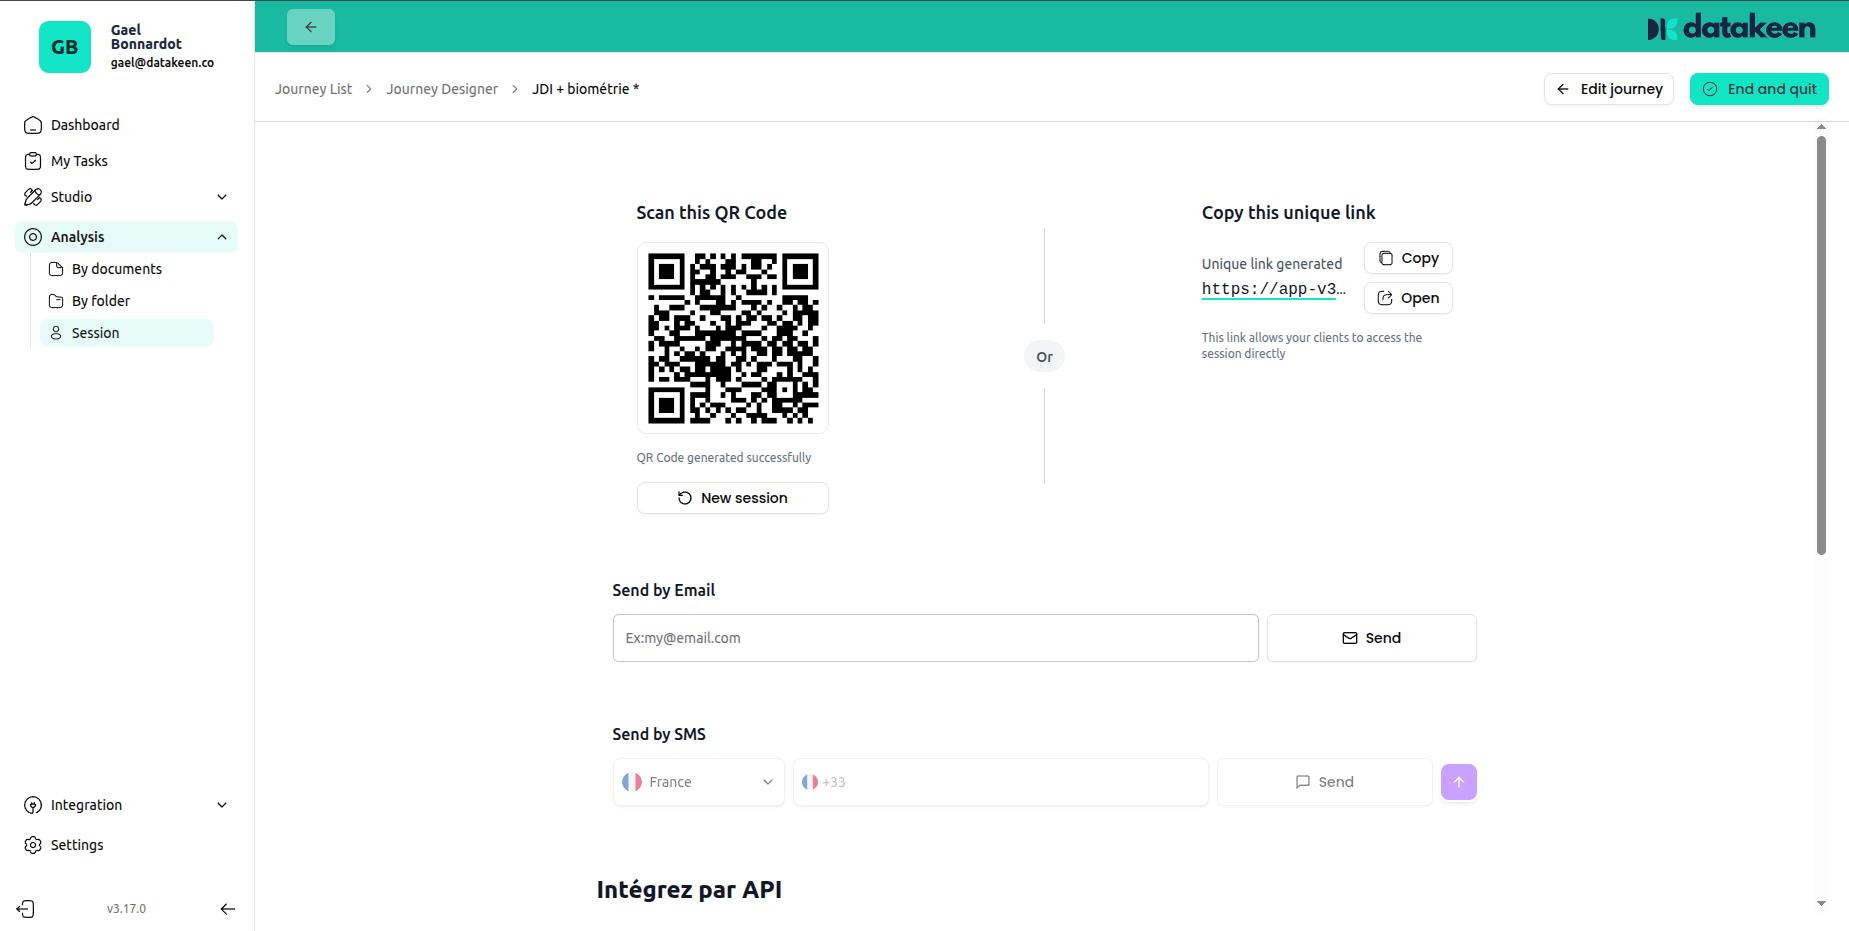
7. Share with your users
Once saved, you can share the journey in several ways:
- QR code — users scan it with their phone
- Link — copy and send the direct URL
- Email or SMS — send it directly from the back office
- API / SDK — create sessions programmatically and embed the journey in your app (see [Journey Sessions](../JOURNEY SESSIONS/idify-sessions-api-v2))
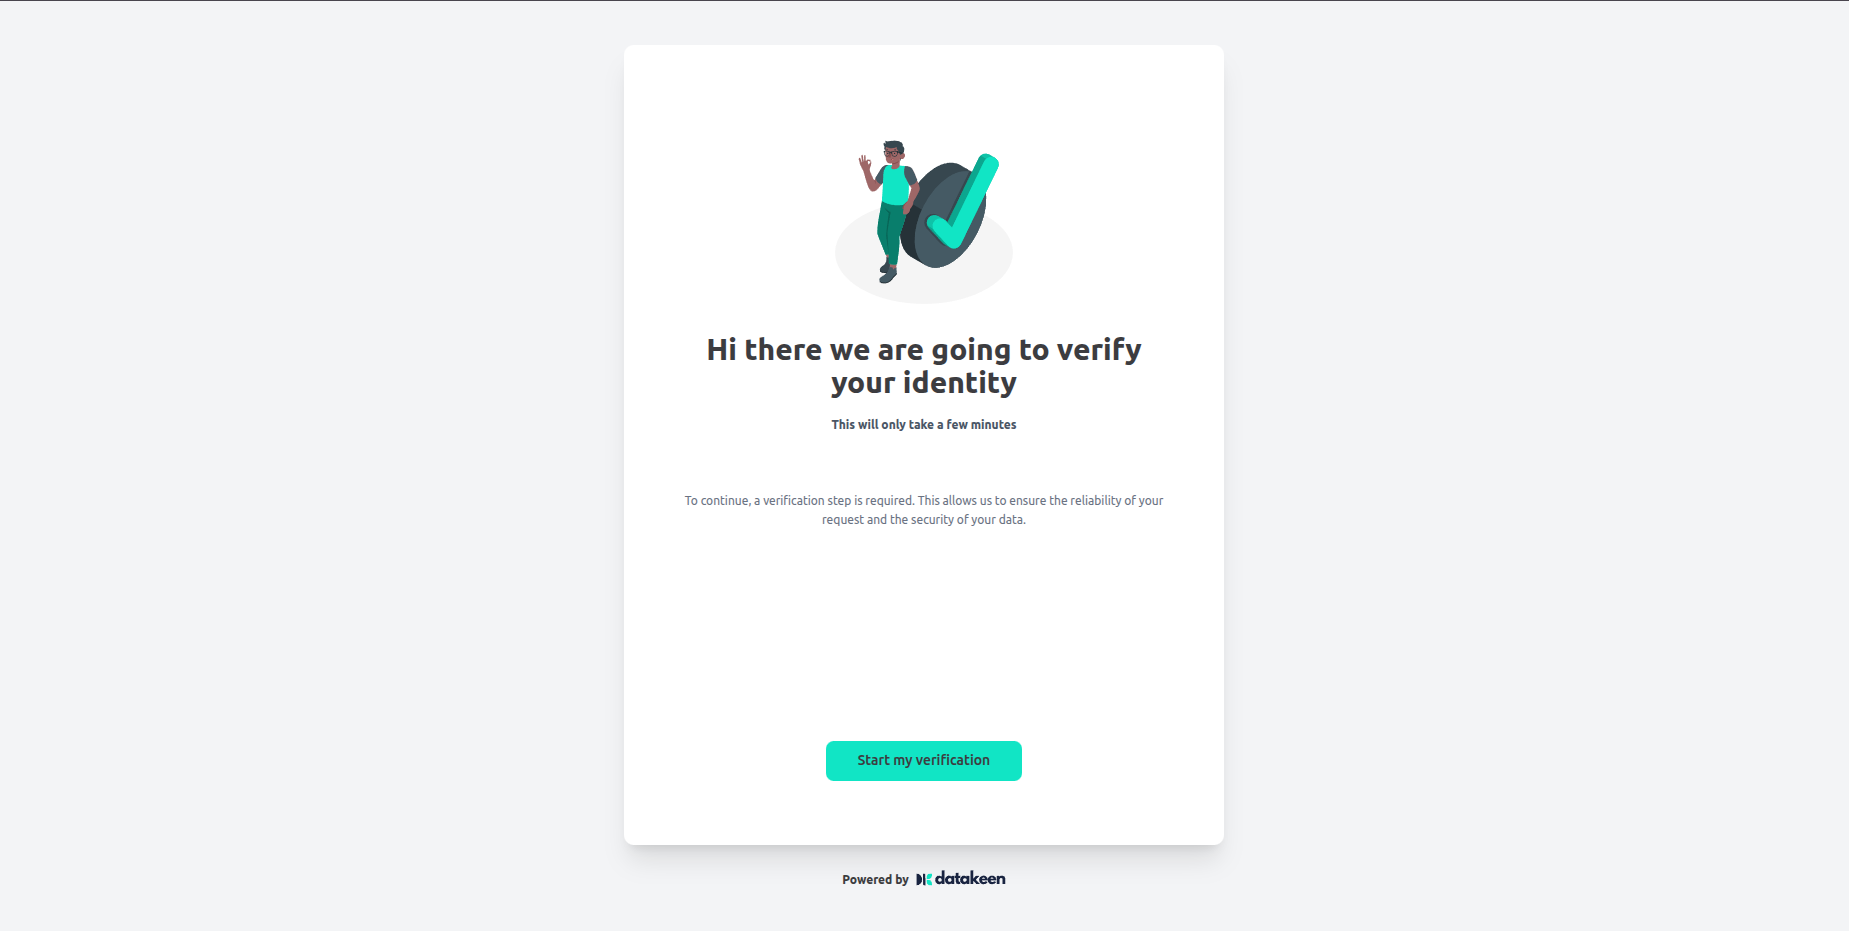
What your users see
When a user opens the journey link, they see a clean, mobile-friendly flow powered by the Datakeen SDK. It guides them step by step through the verification process.
Results are automatically stored in your back office under Analysis as soon as the user completes the journey.
Updated 1 day ago